The wonderful world of bread is so extensive and boasts an offering that feels like an unlimited amount of possibility. This makes it great for those who love to experiment and try different styles of bread and methods. Bread has evolved so much over time and has so many devices that have been created to speed up the process. From bread machines, mixers, proofers and so many more!
We often get so caught up in the world of convenience we forget where it started. At the very foundation. Bread is made up of 4 ingredients, Flour, Salt, Water and yeast. It was all made by hand (Artisan). Making this wondrous food, which has so many adaptations. Was a journey of the senses, you could smell the yeast, feel the gluten as you worked the dough, and see it starting to tighten into a perfect dough ball and by the end of this arduous journey, you could finally taste the product of your labour. We lose so many of these little joys when making bread in the modern era. It feels good to rewind the clock and step back in time when you could get truly immersed in the art. To know by the end you made this bread from scratch, using only your hands and some heat would have felt rewarding, and the good news is it still does. This isn’t a light project that is quick, it takes time. The time you put in definitely yields astounding results.
There were so many methods for bread baking back in the Artisan era. This included baker cloths (Couche cloth, used for shaping and proofing), Banneton baskets (For proofing), and a lame to add the baker’s signature. These signatures were used to identify which baker had made the bread or even used to identify who it was for. The techniques have been lost in time. So to bring them back into the modern era and see that they still work is a true testament to the skill of bakers of old and a reflection on the recipes.
Today I took the jump, back in time to create a wondrous artisan-style loaf. To once again, get lost in the journey. I have pulled the recipe from “Flour, Water, Salt, Yeast” a book by Ken Forkish. This book is wonderful and covers so many fundamentals of Artisan Bread and Pizza. A lot of the recipes in this title are overnight and use some form of pre-ferment. Pre-ferments are an incredible extra step. That comes in many forms. One of our personal favourites is using a poolish, This is a mix of flour, water and a little yeast. The poolish is then left for a considerable amount of time. The longest we have left is 15 hours. The fermentation that occurs during this time adds so much depth of flavour, you would believe that this was a sourdough. So this is awesome if you love the taste of sourdough but don’t want all the effort of making a starter and looking after it. Yeast is a living organism. Don’t get me wrong sourdough is absolutely to die for and it says a lot about a baker that can pull this off to perfection. There is a reason they are so sought after. But being in the NT we don’t have access to the best flour for the starter, so it suits us better to use a pre-ferment. Today, however, I want to enjoy this by the end of the day. So we will be negating the pre-ferment. We will be making the recipe “The Saturday White Bread”. This recipe still uses a technique called Autolyse. This is an additional step you take before mixing your dough. This is done by mixing your flour and water together and then letting it sit for 30 minutes at room temperature. The purpose of this is to pre-hydrate the molecules found in the flour. I am definitely not a scientist, so I won’t try and blow some brain cells explaining what molecules are present in flour. ( If you are interested there is a book ” On Food and Cooking” by Harold McGee. The book goes into food science. )
You can use this method on any bread recipe you produce. Experiment with it and have some fun. Take your favourite recipe and add this step. Then compare it to your recipe. Is there any difference? Let us know.
So the recipe is simply:
- 1000 G Flour
- 720 G Water 32’c
- 21 G Salt
- 4 G Yeast
As stated before we are peeling back all the modern trends, some people love to add some bread improver, but for the sake of today’s bake, we will keep it pure.
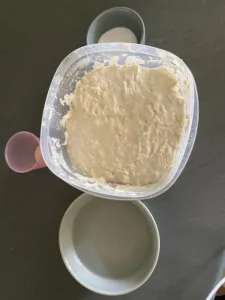
You start by making the Autolyse and let it sit for 30 minutes, then comes the messy part. You have to mix this by hand, so have a little bowl of water next to you for finger dipping. It is okay to dip your hands 4 -5 times during this step.

Sprinkle the yeast on top of the autolyse and work it in until just incorporated, then repeat for your salt. Never add salt directly to yeast, or it will kill it.
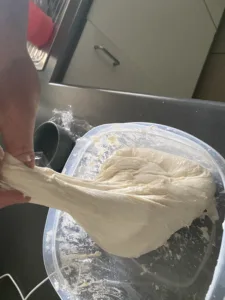
Once both are incorporated keep working your dough. I love the lift-and-fold method. Grab an edge of the dough, pull it up and fold it over itself. Repeat until you get a rough ball. This should take around 5 minutes.
Don’t stress if it doesn’t come together, for you will be doing 2 more folds over the next 90 minutes. Let it sit for 10 minutes then repeat the lift-and-fold method. It should start becoming more

smooth by this point. Then let it rest again, this time for around 20 – 30 minutes. You guessed it after the time has elapsed repeat the method from before. The only difference is this time you want
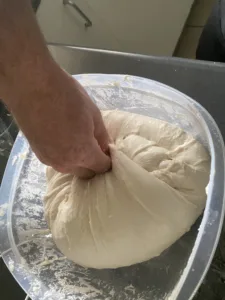
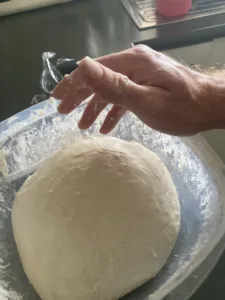
to finish with a smooth ball of dough. Now leave it, seriously leave it. Go away for a couple of hours and forget it exists. To me, this is still the most challenging part of the process. But trust the process. This is crucial for the depth of flavour we were discussing earlier. Depending on the temperature of your house it may take longer or shorter. As we are in the NT this will not take the full amount of time.
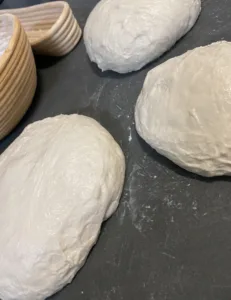
After about 5 hours have passed. You can now divide the dough and give it a quick pre-round. This simply is shaping the dough into a ball, I like to use the tension on the bench, and move the dough around with my palm, in a slight circular motion so it gets tighter. This dough is 72% hydrated. Respectively the dough could even be higher in hydration because we have added extra water in the previous steps. So this dough will be very difficult to shape. To remedy this, you can either wet your hands again as in previous steps or use flour (Taking note that adding flour can alter the hydration of the dough). Have noted that some chefs even coat their hands in a little oil to help with this.
Once they are pre-rounded you can use a Banneton basket to proof the dough,

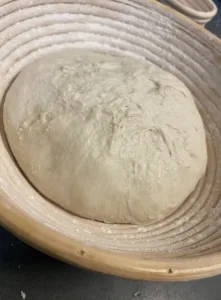

this helps the dough keep its shape and even gives it a signature groove from the basket. If you do not have a Banneton basket you can still make this bread, you will just have to place it in the vessel you are going to cook it in. This way it proofs in there. This is a simple way to get it into the oven once it has increased in volume. Roughly 75% in total volume increase. If working with a dutch oven, you will need to place it into your oven at 245’c if using conventional or 220’c if using convection (Fan Forced). It will have to be pre-heated first, this builds up steam within the dutch oven. That way when the bread goes in, it gives it a great initial rise and creates a crisp crust. Now all there is to do again, is you guessed it , hurry up and wait! If you are using the vessel and not a dutch oven to cook the bread in, it doesn’t need to be pre-heated. Also the oven can be a bit lower in temp aiming for 220’c for conventional or 200’c convection.
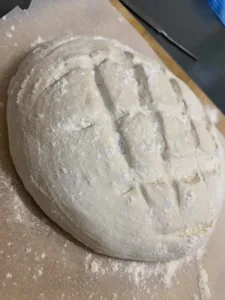
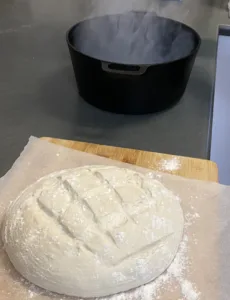
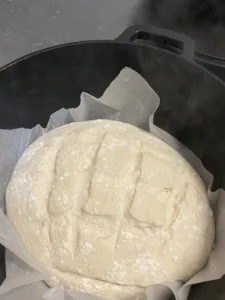
Once your dough has increased in volume it is time to take it out. I like to put a piece of lightly floured parchment paper down and turn my dough out from the Banneton basket. Then I apply my bakers signature, a random slew of cuts. This gives it a unique look and also helps steam escape.
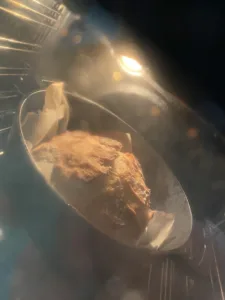
This is the dangerous part! You will need to get some oven gloves on, if I don’t have any handy I reach for tea towels. Grab the pre-heated dutch oven out of the oven, remove the lid, then quickly and carefully place your dough in, that is easy as lifting the parchment from the corners and placing it in. Then quickly place the lid back on. Put it back into the oven and bake for 30 minutes. After this, you need to remove the dutch oven again, take the lid off and place back in for additional 20 minutes. Then after that time, just check it every 15 minutes if it wasn’t done yet. You should have a crust that is dark brown in colour.

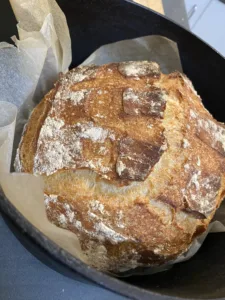

Once done, bring the bread out of the oven and place on a cooling rack. A great tip to know if your bread is ready, tap the bottom. It should sound hollow. Now I know! You just want to get slicing, so you can enjoy all this arduous labour that you have undertaken, but HALT! It is crucial to let the bread sit for a minimum of 15 minutes, around 45 minutes is great. But who can wait that long! Once it has rested, get your trusty bread knife, your favourite spread and get slicing! Enjoy the sound of the crunchy crust as you slice into it, the aroma that escapes from within. Congratulations, take the time to enjoy this moment.
If you are still reading this and have given this recipe a shot, let us know what you think? Did you enjoy the labour of love? Was the end result everything you imagined?