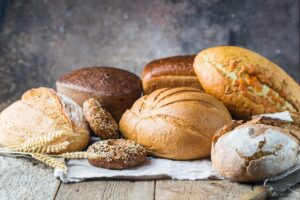
Bread! This is a wonderful, tasty and versatile food. There are so many different types all over the world. From the Foccacia of Italy to the Na’an of India, the damper of Australia, the Baguette of France and so many more.
Bread can be a tricky art requiring respect and much practice. There are Artisan Bakers who have dedicated their whole life to perfecting the most amazing “Artisan Style Bread”.
So this brings the question, how can we enjoy amazing bread baked at home? Is there some trickery, do we really require these big fancy ovens and equipment?
In short, the answer is no. Bread has been made for over a century. Back when there was no equipment. So how can you bake the best homemade bread, for your whole family to enjoy? Or just flex your baking skills and invite your friends around?
Well, there are quite a few tricks out there you can implement to get the perfect baked bread at home!
In this blog, we will cover 5 of the top tips that we can give. To help you amplify your baking skills.
1. Yeast Activation
As you know we live in rural Australia, so access to ingredients is quite limited. So we get whatever is available at our local supermarket. This ends up being the “Lowan Instant Dried Yeast”.
So before we use yeast, it is best to activate the organism. All yeast is a living being and reacts in such a way. So, to use the yeast, we will first have to see if it is alive. This can be done simply by adding some warm water, no hotter than 30’c works well. Then add a pinch of sugar (Yeast has quite the sweet tooth) and then a pinch of flour. Once you have given this a quick little mix, sit it in a warm spot for 5 minutes. When you return you should see some activation. There should be some bubbles and foam forming at the top. 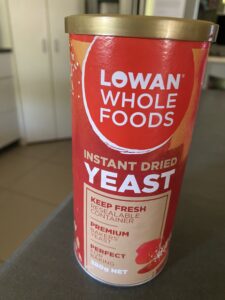
There are many different variations of yeast out there, but that’s for a different blog post.
2.Gluten Development
Flour contains a protein called Gluten. These proteins are what gives structure to our bread. Another great tip is to knead your dough to the desired gluten development. This is usually dictated in the recipe. But if it is not specified within the recipe you are using, then performing the windowpane test is a great way to gauge the development. This can be done by taking a chunk of dough and stretching it between your fingers. It should stretch and not tear, you should be able to stretch it until you can start to see light through it. This is a good indication you have sufficient gluten development. Some recipes will require less gluten development.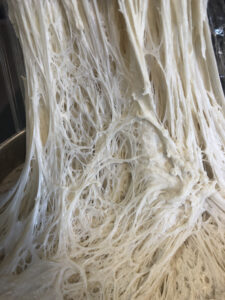
There are also other yeast products that require less gluten development.
3.Desired Dough Temperature
After you have worked hard kneading your dough (Or let the mixer do the heavy lifting) there is a little trick you can do. If you have a temperature probe lying around your house. It is a great time to stick that in your freshly kneaded dough and get a temperature reading. Yeast obviously has a preferred temperature. As some of us prefer summer and some winter. Yeast works best at a temperature range between 25’c and 27’c. If your probe reads less or more, don’t stress. This is a great indication you can knead slightly less or slightly more next time. Also, there are some other factors that can affect your dough temperature. For example, was your flour at room temperature when you used it, or do you store it in your fridge? What is the temperature of your environment? Did you mix the dough in a cold air-conditioned house or a hot bakery? All these factors and more affect your final dough temperature. As the gluten development above, some recipes may actually call for a certain Desired Dough Temperature (DDT). These doughs may call for longer bulk fermenting periods, where you want the yeast to work slowly. This results in deeper fermented flavours. Great examples of this are “Pre-ferments”, which we will cover in a whole other blog. Bread baking is like Pandora’s box, once you open it you won’t stop learning new things. So give probing your doughs a try. If you don’t have a probe, simply feel your dough, it should feel warm.
4.Knowing the cooking times
There are so many variables when working out the cooking time for your bread. Some recipes may use a conventional oven, others may use convection (Fan Forced). Even some recipes might have been made in a rational with steam injection. So taking these factors into account when selecting a recipe is important. We all have different ovens, ovens are like people, and no one is truly the same. So taking the time to know your oven is a great step. A great way is to purchase a manual oven thermometer and place it in your oven. Then preheat your oven to 200’c, once this has been achieved. Grab that little handy oven thermometer and check the temperature. When I did this at home it read, 190’c. So taking into account a 10’c drop in temperature. I know it may take a little longer for my bread to bake. Unfortunately, I would love to say this is it and now I can just chuck my bread in, set a timer and disappear until it goes off. But ovens are as humanity, imperfect. So there may be hot spots in your oven. This will take a lot of trials to work out your oven’s temperaments. Slowly but surely by understanding your oven, you will be able to modify the recipe to suit you. Some many countless frustrations experienced when learning about our oven.
If you only have a conventional oven and the author of the recipe used a fan-forced oven. Then it is a safe bet to add an extra 15 – 20’c. The opposite is true if the other way around. As for steam injection, this leads to our next and final tip for this blog.
5.Pre-steaming
When we bake our bread these days we use an “Anova Oven” which has steam injection. Before this innovative piece of equipment, we had to find a way to create steam in our oven, when baking bread. Steam is amazing when baking bread, it helps support a great initial rise and results in a crackly crust. So how did we create steam before the “Anova”? Well, we used only a few methods. But with these methods, a pre-warning, ensure you are wearing oven mitts and keep your face away. Otherwise, you will have to explain that bread gave you that burn mark on your face.
1. So when pre-heating your oven, put a cast-iron skillet on the bottom of your oven. If you don’t have a cast iron pan that is fine, use another frying pan. Or try the next method. Once the oven is preheated and you are about to load that beautiful bread dough in, splash some water into the skillet you placed in the bottom of your oven, load the bread in and close the door. The faster you get the bread loaded in after splashing the water on the skillet the better. This will help trap more of that steam before it escapes.
2. The other method is to spray the top of your dough with some water and use a spray bottle to spray some water into the oven as well. But same as above, close that door ASAP. Trap that wonderful steam in your oven.
There is a wonderful piece of kit that you can also bake your bread in, it traps the steam inside. The “Dutch Oven” is a cast-iron pot with a lid, that you pre-heat in the oven, place your dough into and bake, then halfway in remove the lid, this will give it an amazing crust.
So there it is!
Some tips you can use to up your home bread baking. There will be plenty of these blogs coming in the future, because as stated before its likes Pandora’s box. We hope this helps you on your journey for the best home-baked bread. Contact us and let us know how you went if these tips worked for you and what you would like to see next. We will be slowly releasing videos on our YouTube channel Cams Cookery. Head over there and maybe subscribe so you can get the jump on our content.